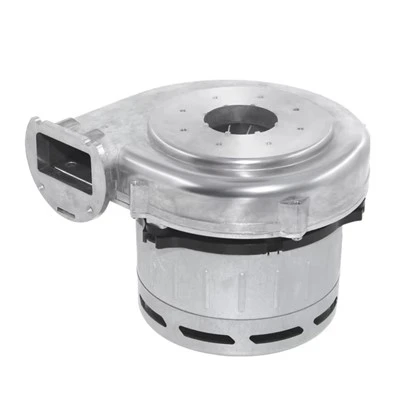
Hey there! I'm a supplier of Centrifugal Exhaust Blowers, and today I'm gonna walk you through the process of replacing the bearings in a centrifugal exhaust blower. It might sound a bit technical, but don't worry, I'll break it down into easy-to-follow steps.
Why Replace the Bearings?
First off, you might be wondering why you'd even need to replace the bearings in your centrifugal exhaust blower. Well, bearings are like the unsung heroes of the blower. They allow the shaft to rotate smoothly with minimal friction. Over time, though, they can wear out due to continuous use, dirt, and lack of proper lubrication. When bearings start to go bad, you might notice some tell - tale signs like strange noises, increased vibration, or reduced blower performance. If you ignore these signs, it can lead to more serious problems and even damage the entire blower.
Tools You'll Need
Before you start replacing the bearings, you'll need to gather a few tools. Here's a list of what you'll typically need:
- Socket set: This will help you remove the bolts holding the blower housing and other components in place.
- Bearing puller: A must - have for safely removing the old bearings from the shaft.
- New bearings: Make sure you get the right size and type of bearings for your specific centrifugal exhaust blower. You can check the blower's manual or consult with us for the correct bearings.
- Grease: High - quality bearing grease to lubricate the new bearings.
- Clean rags: To wipe down the components and keep everything clean during the process.
- Hammer and punch (optional): In some cases, you might need these to gently tap out stubborn parts.
Step 1: Safety First
Safety is always the top priority. Before you start working on the blower, make sure it's completely turned off and unplugged from the power source. This will prevent any accidental starts and keep you safe from electrical shocks. Also, wear appropriate safety gear like gloves and safety glasses to protect your hands and eyes from any debris.
Step 2: Remove the Blower Housing
Using your socket set, carefully remove the bolts that hold the blower housing in place. Set the bolts aside in a safe place so you don't lose them. Once the bolts are removed, gently lift off the blower housing. This will give you access to the internal components of the blower, including the impeller and the bearings.


Step 3: Remove the Impeller
The impeller is the rotating part of the blower that moves the air. You'll need to remove it to get to the bearings. There are usually bolts or a locking mechanism holding the impeller in place. Use your socket set to remove these and carefully take off the impeller. Be gentle when handling the impeller to avoid damaging it.
Step 4: Remove the Old Bearings
Now it's time to remove the old bearings. This is where the bearing puller comes in handy. Place the bearing puller on the bearing and carefully tighten it until the bearing starts to come off the shaft. If the bearing is really stubborn, you can use a hammer and punch to gently tap it loose, but be very careful not to damage the shaft. Once the bearing is removed, use a clean rag to wipe down the shaft and remove any dirt or old grease.
Step 5: Inspect the Shaft
While you have the bearings removed, take a close look at the shaft. Check for any signs of damage, such as scratches, dents, or wear. If you notice any significant damage, you might need to replace the shaft as well. A damaged shaft can cause premature bearing failure, so it's important to address any issues at this stage.
Step 6: Install the New Bearings
Before installing the new bearings, make sure they are clean and free of any debris. Apply a thin layer of high - quality bearing grease to the inside of the bearings. This will help reduce friction and extend the life of the bearings. Carefully slide the new bearings onto the shaft. You may need to use a soft - faced hammer to gently tap them into place, but make sure you're tapping evenly to avoid damaging the bearings.
Step 7: Reassemble the Blower
Once the new bearings are installed, it's time to put the blower back together. Start by reinstalling the impeller. Make sure it's properly aligned and tightened securely. Then, place the blower housing back on and reinstall the bolts. Tighten the bolts evenly to ensure a proper seal.
Step 8: Lubricate and Test
After reassembling the blower, apply a bit more grease to the bearings if needed. Plug the blower back in and turn it on. Listen for any strange noises or vibrations. If everything sounds and feels normal, then you've successfully replaced the bearings in your centrifugal exhaust blower!
Our Product Recommendations
As a Centrifugal Exhaust Blower supplier, we offer a wide range of high - quality blowers. Check out our 120V High Pressure BLDC Air Blower, which is perfect for applications that require high - pressure air flow. If you need a blower with a unique design, our Peripheral By Pass BLDC Blower might be the right choice for you. And for heavy - duty applications, our 1200W High Pressure BLDC Blower provides powerful performance.
Contact Us for Purchasing
If you're interested in our centrifugal exhaust blowers or need more information about bearing replacement or any other technical issues, feel free to reach out to us. We're here to help you find the right blower for your needs and provide you with the best customer service. Whether you're a small business or a large industrial operation, we have the products and expertise to meet your requirements.
References
- "Centrifugal Blower Handbook" - A comprehensive guide on centrifugal blowers and their maintenance.
- Manufacturer's manuals for centrifugal exhaust blowers. These manuals often contain detailed information on bearing replacement and other maintenance procedures specific to the blower model.